This repository will not be updated. The repository will be kept available in read-only mode. Refer to https://github.com/IBM/monitor-wml-model-with-watson-openscale for a similar example.
DISCLAIMER: This notebook is used for demonstrative and illustrative purposes only and does not constitute an offering that has gone through regulatory review. It is not intended to serve as a medical application. There is no representation as to the accuracy of the output of this application and it is presented without warranty.
In this Code Pattern, we will use anonymous patient data to predict the best drug to treat heart disease. This notebook introduces commands for getting data, model persistance to Watson Machine Learning repository, model deployment, and scoring.
When the reader has completed this Code Pattern, they will understand how to:
- Prepare data, create an Apache Spark machine learning pipeline, and train a model.
- Publish a sample model in the Watson Machine Learning (WML) repository.
- Deploy a model for online scoring.
- Score the model using sample scoring records and the scoring endpoint.

- User creates a project in Watson Studio using a Jupyter notebook, Python 3.5, and Spark.
- User uses Db2 Warehouse in the Cloud to load and read data.
- User uses PySpark to create a pipeline, train a model, and store the model using Watson Machine Learning.

-
An account on IBM Watson Studio.
- Clone the repository
- Create Watson services in IBM Cloud
- Save the credentials for your Watson Machine Learning Service
- Create the DB2 Warehouse on Cloud Service and load data
- Create a notebook in IBM Watson Studio
- Run the notebook in IBM Watson Studio
$ git clone https://github.com/IBM/prediction-using-watson-machine-learning
$ cd prediction-using-watson-machine-learning
- Create a new project by clicking
+ New projectand choosingData Science:

Note: Services created must be in the same region, and space, as your Watson Studio service. Note: If this is your first project in Watson Studio, an object storage instance will be created.
- Under the
Settingstab, scroll down toAssociated services, click+ Add serviceand chooseWatson:

-
Search for
Machine Learning, Verify this service is being created in the same space as the app in Step 1, and clickCreate.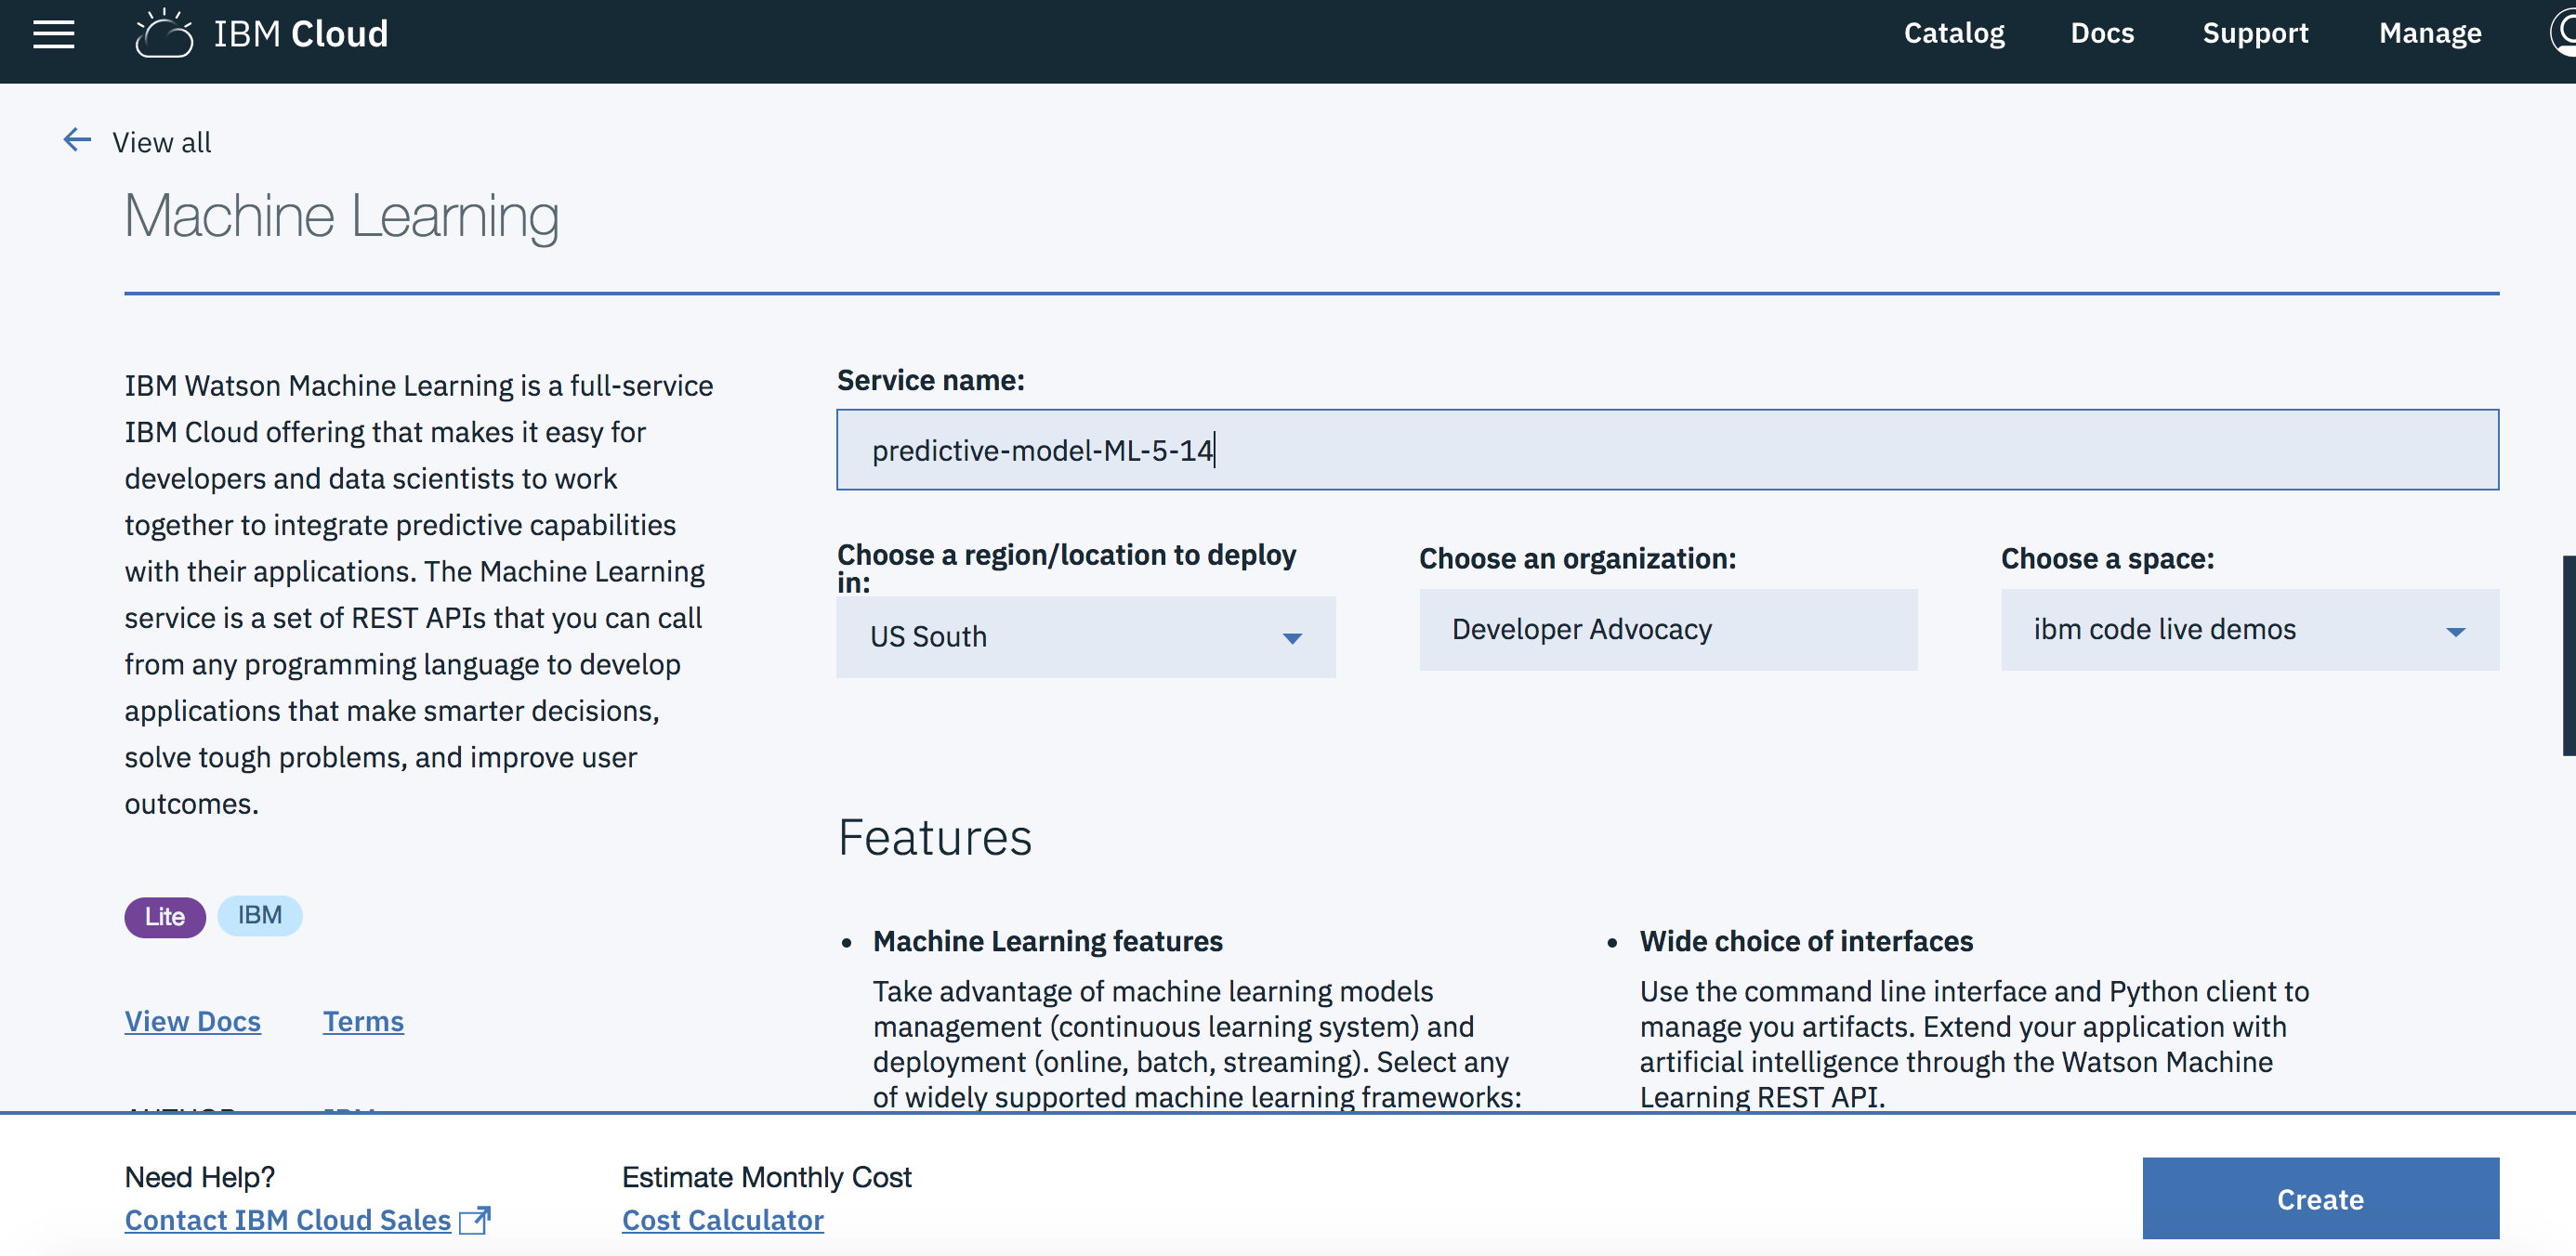
-
Alternately, you can choose an existing Machine Learning instance and click on
Select.
-
The Watson Machine Learning service is now listed as one of your
Associated Services. -
Click on the
Settingstab for the project, scroll down toAssociated servicesand click+ Add service->Spark. -
Either choose an
ExistingSpark service, or create aNewone.

-
In a different browser tab go to https://cloud.ibm.com/ and log in to the Dashboard.
-
Click on your Watson Machine Learning instance under
Services, click onService credentialsand then onView credentialsto see the credentials.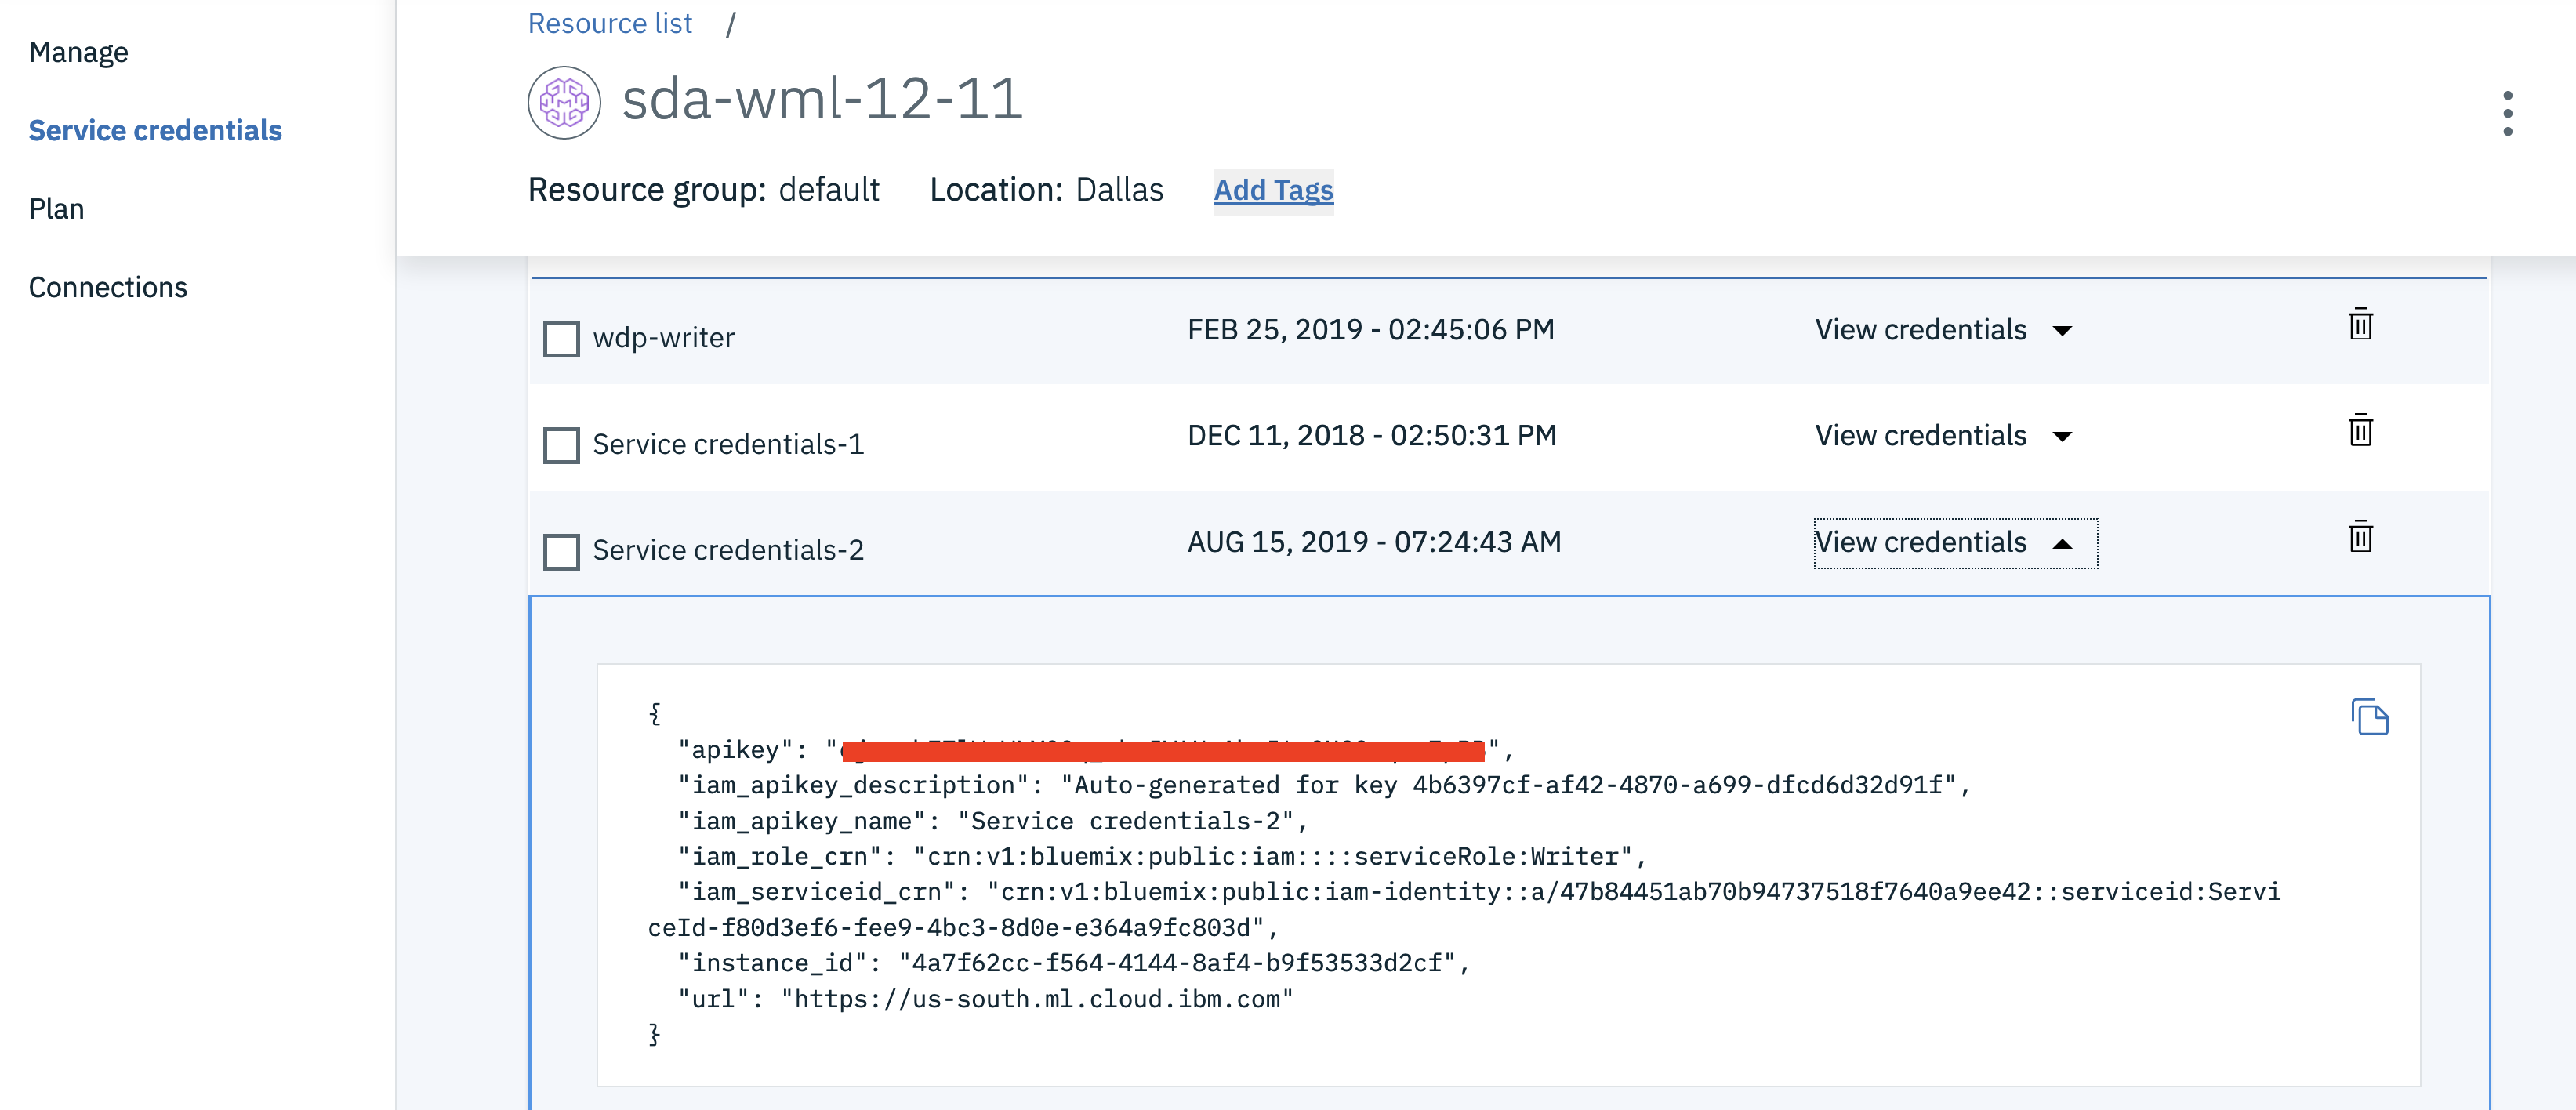
-
Save the username, password and instance_id to a text file on your machine. You’ll need this information later in your Jupyter notebook.
-
Create a Db2 Warehouse on Cloud Service instance (an entry plan is offered).
-
Get the authentication information for DB2, which can be found under the
Service Credentialstab of the Db2 Warehouse on Cloud service instance created in IBM Cloud. ClickNew credentialto create credentials if you do not have any. -
Create the
DRUG_TRAIN_DATA_UPDATEDtable in Db2 Warehouse on Cloud. You will use the drug_train_data_updated.csv file from this git repository. -
Click the
Openicon to open the console.

-
Use the
usernameandpasswordfrom theservice credentialsto log in. -
Click the
Load Dataicon.

-
Drag and drop or browse to the
data/drug_train_data_updated.csvfile and pressNext. -
Under
Select a load target->Schemapick theusernamefor your credentials and click it. -
Under
TableclickNew Table. -
Write the name
DRUGTRAINDATAinCreate a new Table->New Table Nameand clickCreate. ClickNextto finish data import. -
Use
;as field separator.

- Click
Nextto create a table with the uploaded data.
-
In Watson Studio using the project you've created, click on
+ Add to projectand click theNotebooktile. -
Select the
From URLtab. -
Enter a name for the notebook.
-
Optionally, enter a description for the notebook.
-
Under
Notebook URLprovide the following url: https://raw.githubusercontent.com/IBM/prediction-using-watson-machine-learning/master/notebooks/MLpredictor.ipynb -
Select the Spark runtime with Python 3.5 .
-
Click the
Createbutton.

-
Enter your DB2 Warehouse credentials in the cell after
2.1 Load the training data from Db2 Warehouse on Cloud. -
Enter your Watson Machine Learning credentials in the cell after
Action: Enter your Watson Machine Learning service instance credentials here.. -
Move your cursor to each code cell and run the code in it. Read the comments for each cell to understand what the code is doing. Important when the code in a cell is still running, the label to the left changes to In [*]:. Do not continue to the next cell until the code is finished running.


This code pattern is licensed under the Apache Software License, Version 2. Separate third party code objects invoked within this code pattern are licensed by their respective providers pursuant to their own separate licenses. Contributions are subject to the Developer Certificate of Origin, Version 1.1 (DCO) and the Apache Software License, Version 2.